この記事は、ニフティグループ Advent Calendar 2022 13日目の記事です。
はじめに
最近ChatGPTにハマっている柴田です。普段はFlutterの開発を個人的に楽しんでいます。今回は、FlutterでHero Animationsを実装してみます。
Hero とは
FlutterのHero Animationsとは、アプリらしいシームレスなアニメーションのことで、Androidで言うshared element transitions、iOSでいうSwiftUI2.0で追加されたmatchedGeometryEffectのようなものです。
遷移先の画面に遷移元と共通または似ている要素がある場合にHero Animationsを使用することでシームレスに画面遷移することができます。
Flutterでは、標準で用意されているMaterial LibraryのHero Widgetを使うことで簡単に実装することができます。
詳細はこちら
https://docs.flutter.dev/development/ui/animations/hero-animations
実装する
カードをタップすると詳細が表示されるUIを実装します。
Heroを使用しない実装
Heroを使う前のコードと動作例です。
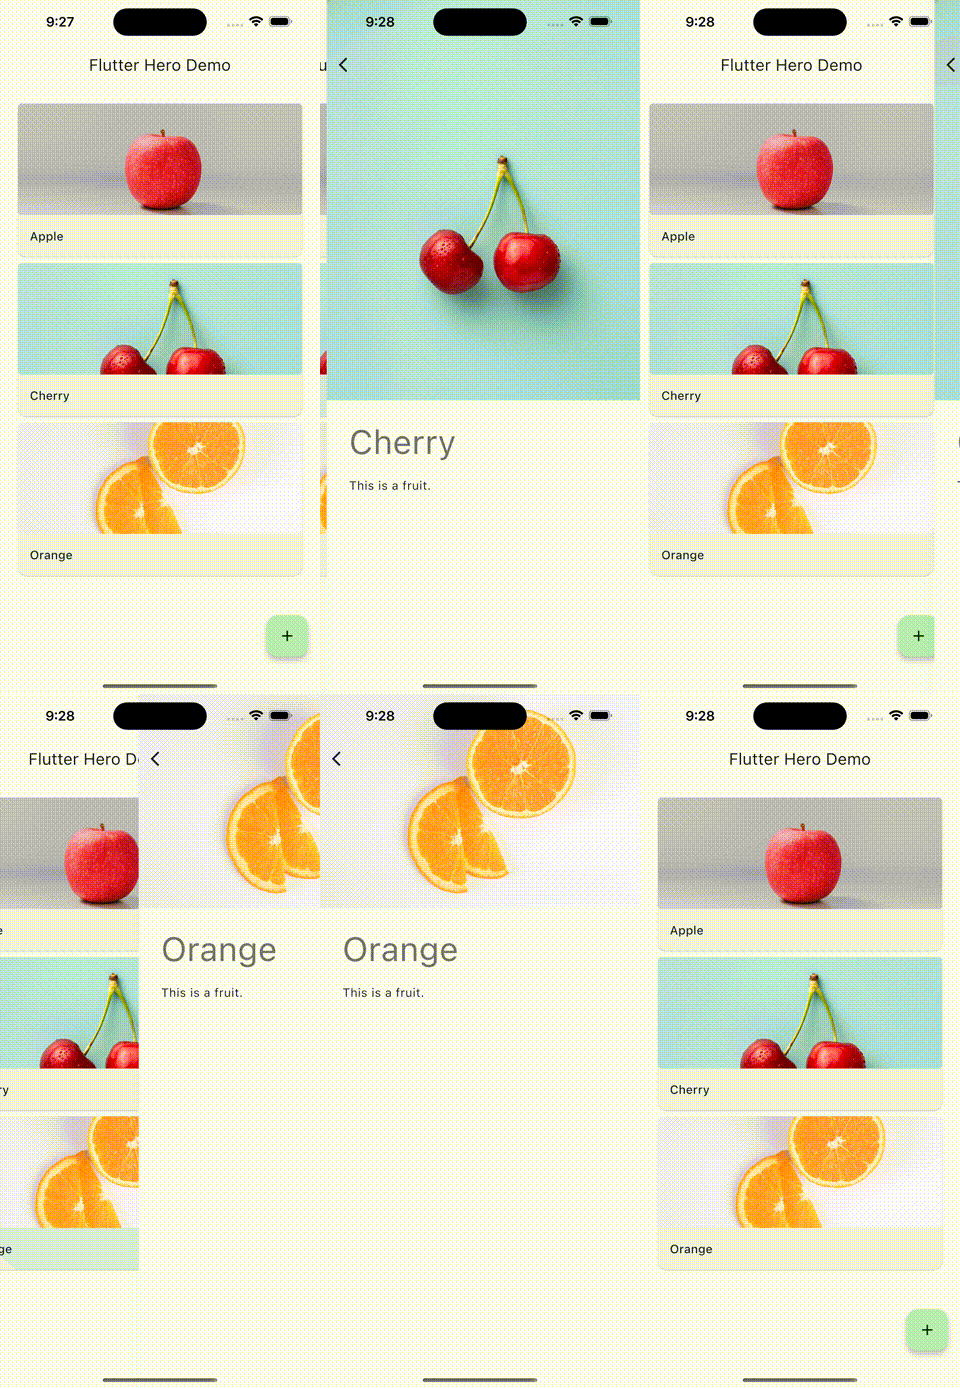
|
1 2 3 4 5 6 7 8 9 10 11 12 13 14 15 16 17 18 19 20 21 22 23 24 25 26 27 28 29 30 31 32 33 34 |
Card( child: InkWell( splashColor: Colors.blue.withAlpha(30), onTap: () { Navigator.push( context, MaterialPageRoute( builder: (context) => DescriptionScreen(cardContent: cardContent), ), ); }, child: Column( children: [ Container( height: 150, decoration: BoxDecoration( borderRadius: const BorderRadius.all(Radius.circular(5)), image: DecorationImage( fit: BoxFit.cover, image: Image.asset(cardContent.imageAssets).image, ), ), ), ListTile( title:Text( cardContent.title, style: Theme.of(context).textTheme.titleMedium, ), ), ], ), ), ); |
|
1 2 3 4 5 6 7 8 9 10 11 12 13 14 15 16 17 18 19 20 21 22 23 24 |
Column( crossAxisAlignment: CrossAxisAlignment.start, children: [ Image.asset(cardContent.imageAssets), Padding( padding: const EdgeInsets.all(30), child: Column( crossAxisAlignment: CrossAxisAlignment.start, children: [ Text( cardContent.title, style: Theme.of(context).textTheme.displayMedium, ), const SizedBox(height: 20), Text( cardContent.description, style: Theme.of(context).textTheme.bodyLarge, ), ], ), ), ], ), |
Heroを使用した実装
このコードにHero Animationsを実装していきます。実装と言ってもImageやTextをHero Widgetでラップするだけです。
Hero Widgetが同一のTagが設定されているWidget間でいい感じにアニメーションを計算してくれます。
Hero Widgetを使って実装したコードと動作例です。
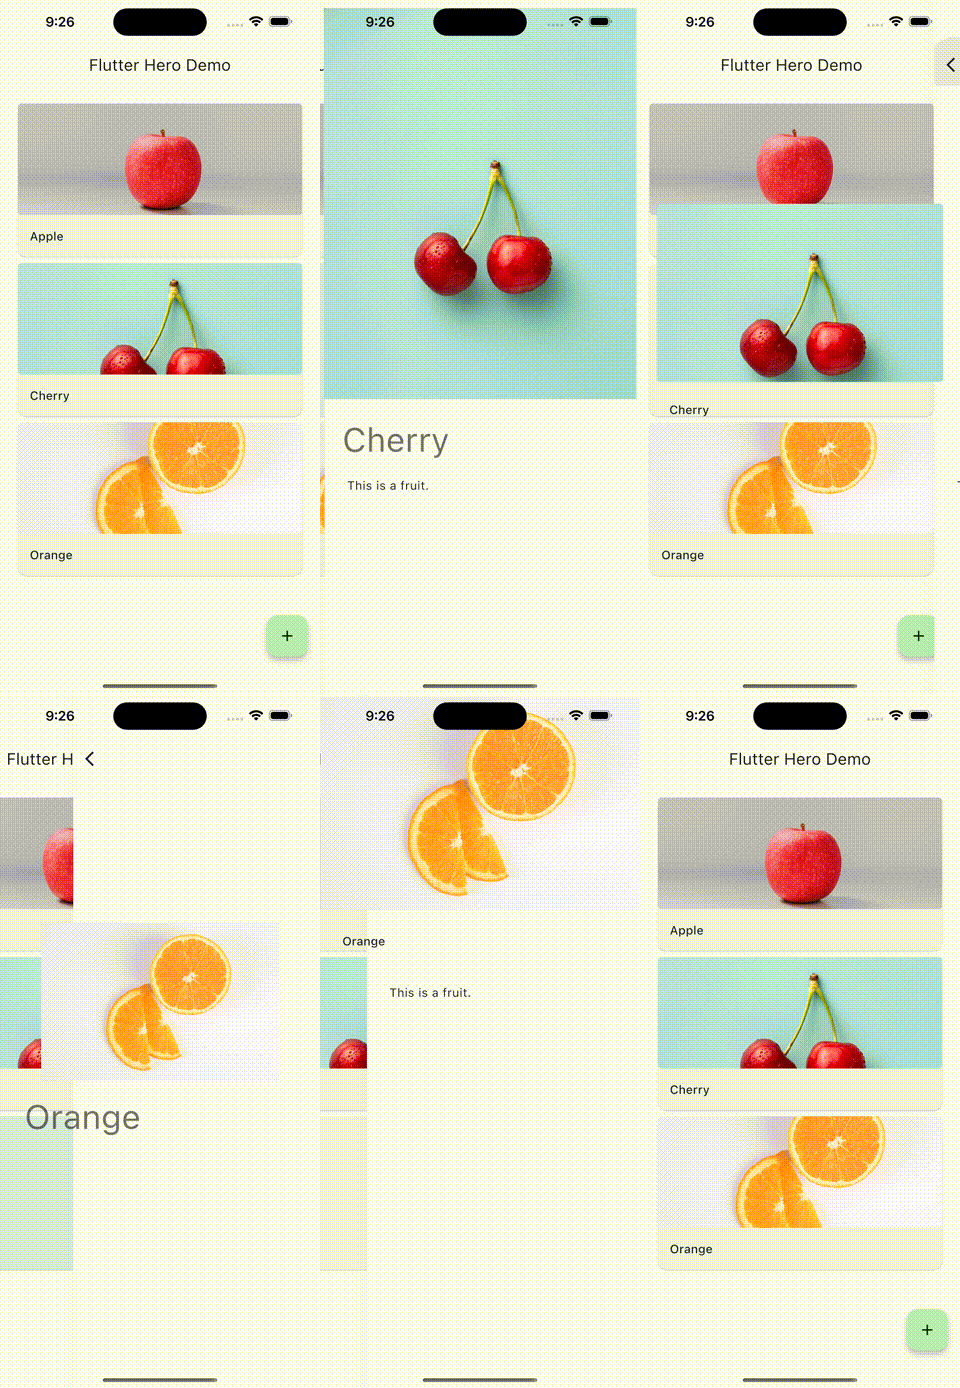
|
1 2 3 4 5 6 7 8 9 10 11 12 13 14 15 16 17 18 19 20 21 22 23 24 25 26 27 28 29 30 31 32 33 34 35 36 37 38 |
Card( child: InkWell( splashColor: Colors.blue.withAlpha(30), onTap: () { Navigator.push( context, MaterialPageRoute( builder: (context) => DescriptionScreen(cardContent: cardContent), ), ); }, child: Column( children: [ Hero( tag: cardContent.imageAssets, child: Container( height: 150, decoration: BoxDecoration( borderRadius: const BorderRadius.all(Radius.circular(5)), image: DecorationImage( fit: BoxFit.cover, image: Image.asset(cardContent.imageAssets).image, )), ), ), ListTile( title: Hero( tag: cardContent.title, child: Text( cardContent.title, style: Theme.of(context).textTheme.titleMedium, ), ), ), ], ), ), ); |
|
1 2 3 4 5 6 7 8 9 10 11 12 13 14 15 16 17 18 19 20 21 22 23 24 25 26 27 28 29 |
Column( crossAxisAlignment: CrossAxisAlignment.start, children: [ Hero( tag: cardContent.imageAssets, child: Image.asset(cardContent.imageAssets), ), Padding( padding: const EdgeInsets.all(30), child: Column( crossAxisAlignment: CrossAxisAlignment.start, children: [ Hero( tag: cardContent.title, child: Text( cardContent.title, style: Theme.of(context).textTheme.displayMedium, ), ), const SizedBox(height: 20), Text( cardContent.description, style: Theme.of(context).textTheme.bodyLarge, ), ], ), ), ], ), |
注意
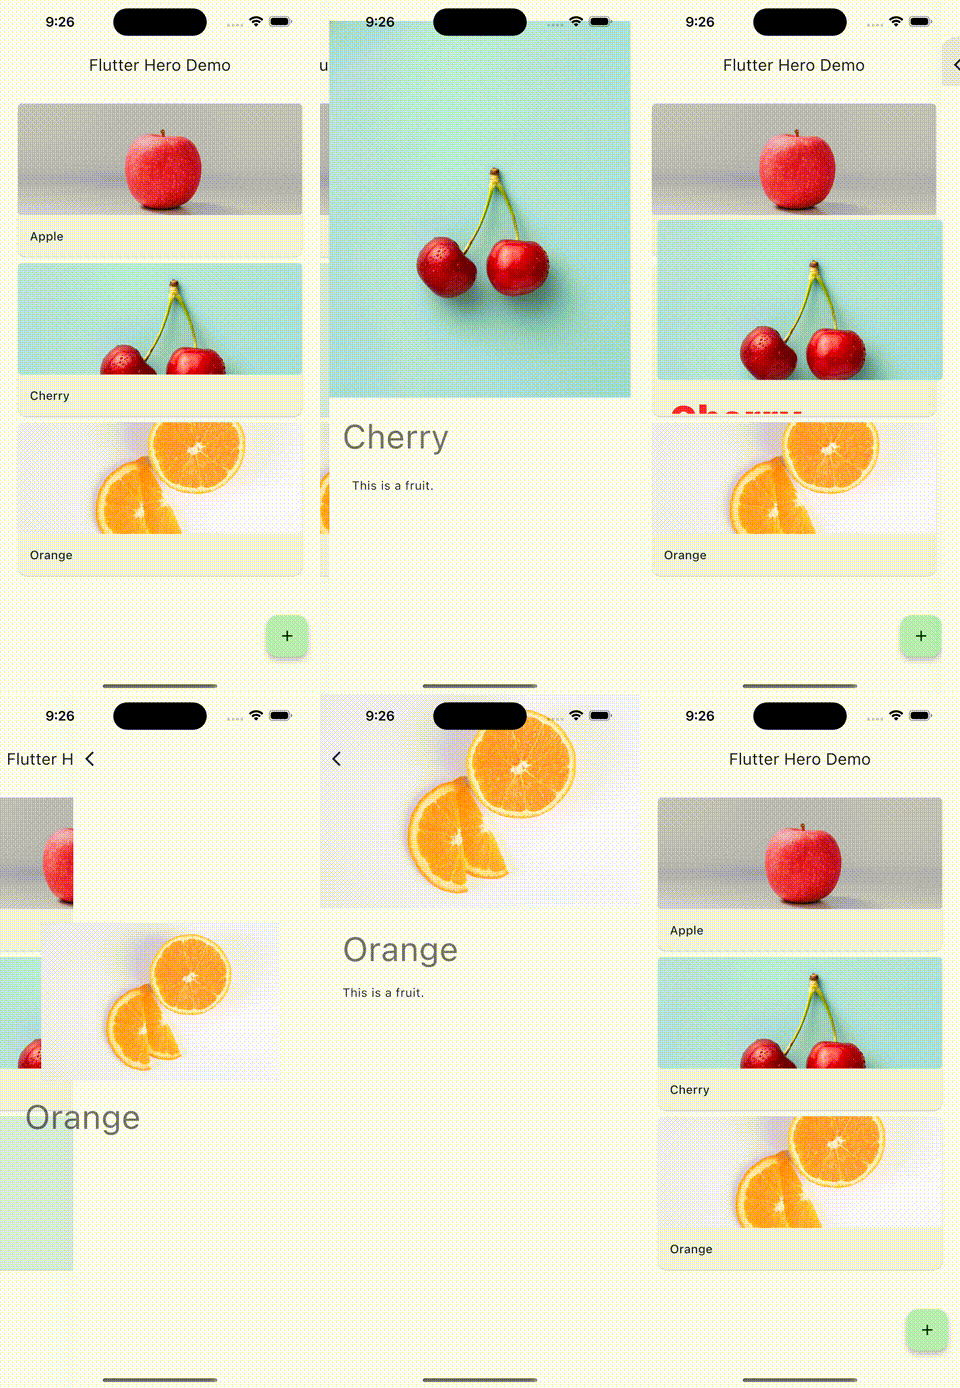
HeroでラップするTextにはstyleを付ける必要があります。
Styleを指定していないと、下の図のようにHero Animationsの処理が上手く行われず、アニメーション時に文字がはみ出してしまいます。
今回実装した全体のコードはこちらで公開しています
https://github.com/ShibataRyusei/flutter-hero-demo
余談
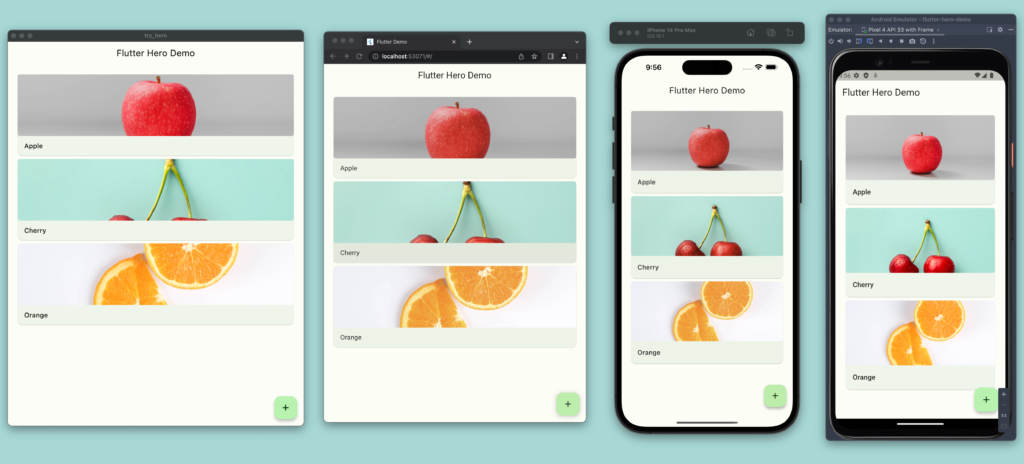
今回の動作例はiOSですが、もちろんAndroid、Web、macOSでも動作しました。(Windows, Linuxは未検証)
一度の実装で複数のOSに書き出せるのは、何度体験しても感動します。
終わりに
今回は、FlutterでHero Animationsを実装してみました。ImageやTextなどのWidgetをHero Widgetでラップするだけでアプリらしいアニメーションが簡単に実装できました。このようなWidgetsが標準で用意されている点からFlutterのDX(Developer Experience)の高さを感じ、ストレスフリーに開発ができました。
みなさんもFlutterで快適な開発体験を!!
明日(14日目)は、ike-chanさんです。お楽しみに!


